How to Create a New Windows Virtual Machine?
You can easily deploy virtual machines with various operating systems by searching for and installing the VMs application from the App Center.
Applicable Versions
TOS 7 and above
Pre-creation Preparations
- Install the Application
- Network Configuration
To enable the virtual machine to use network services normally, you need to enable OVS (Open vSwitch) for the host machine's network connection to provide an independent and isolated virtual network for the virtual machine. Currently, only wired network ports and aggregated network ports support enabling OVS; wireless network ports are temporarily unsupported. How to enable: Open Control Panel > Network Service > Interface, click on OVS, and enable it. - Download Drivers
VirtIO Guest Tool Drivers (for Windows 7 Version)
VirtIO Guest Tool Drivers (for Windows 10 and Above Versions)
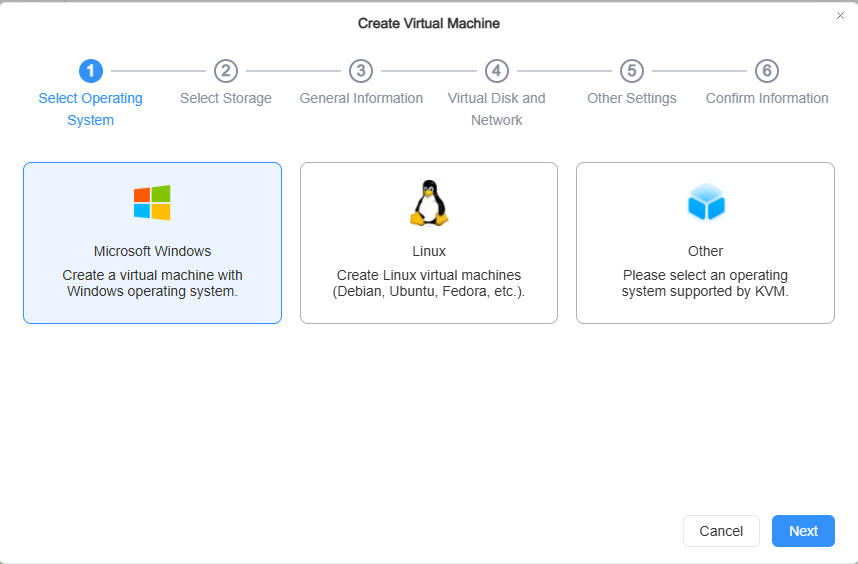
Creating a Virtual Machine
- On the virtual machine list tab of the VMs application, click the "+" button in the upper left corner to start creating.
- Select the virtual machine type: Windows\Linux\Other available images.
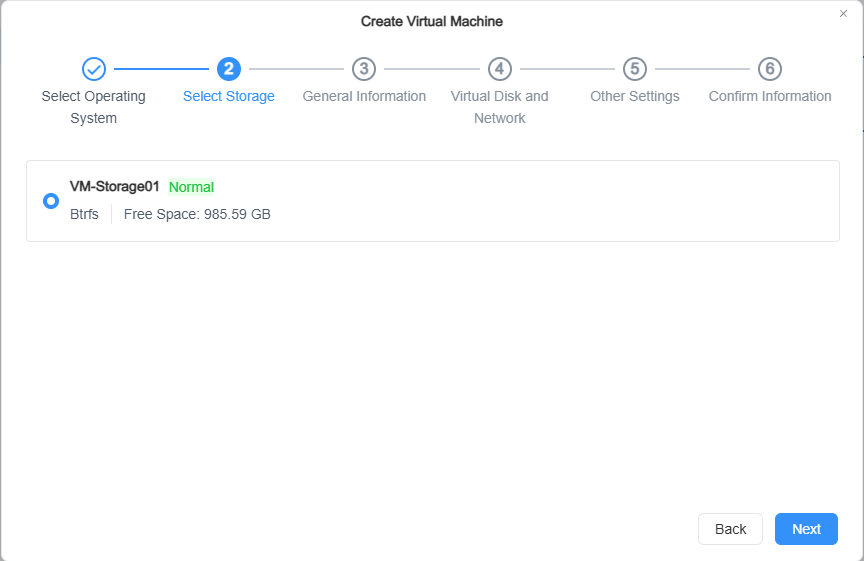
- Select storage space.
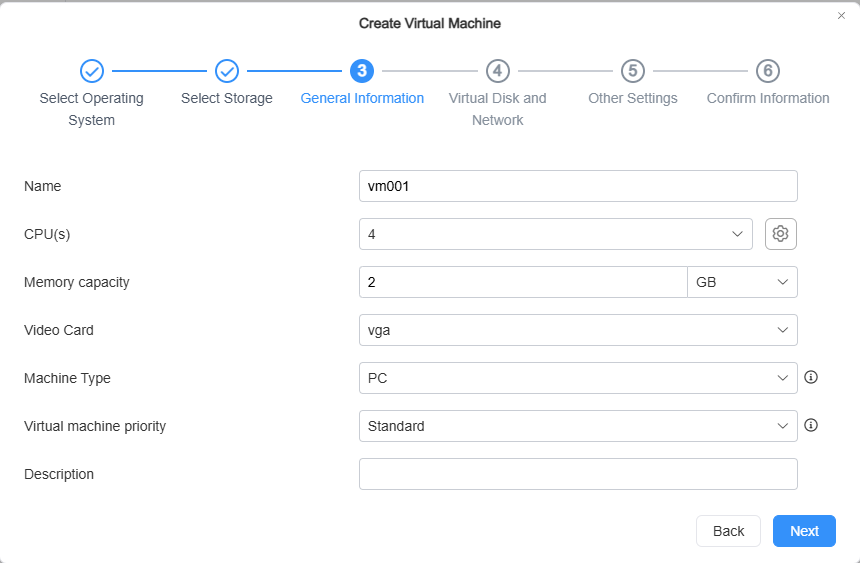
- Configure general information for the virtual machine.
• CPU cores, memory allocation, and GPU type can be adjusted according to the host machine's hardware situation. You can also proceed with the default configuration initially and adjust it later based on usage.
• The machine type and firmware are recommended to be selected according to the default configuration. Some operating systems have compatibility requirements for the motherboard and firmware; improper adjustments may cause boot failure. The machine type and motherboard firmware cannot be modified after creation.
- Set up virtual disks and network.
• Add virtual disk: Select the corresponding disk bus type, choose the storage space to use, and enter the allocated capacity. The default configuration includes one virtual disk with an initial 40GB of storage space. (It is recommended to support creating up to 8 virtual disks.) Click Next after confirmation.
• Add virtual machine network: Select the required OVS network port. If the desired one is not available, you can create a virtual network switch through the VMs network module.

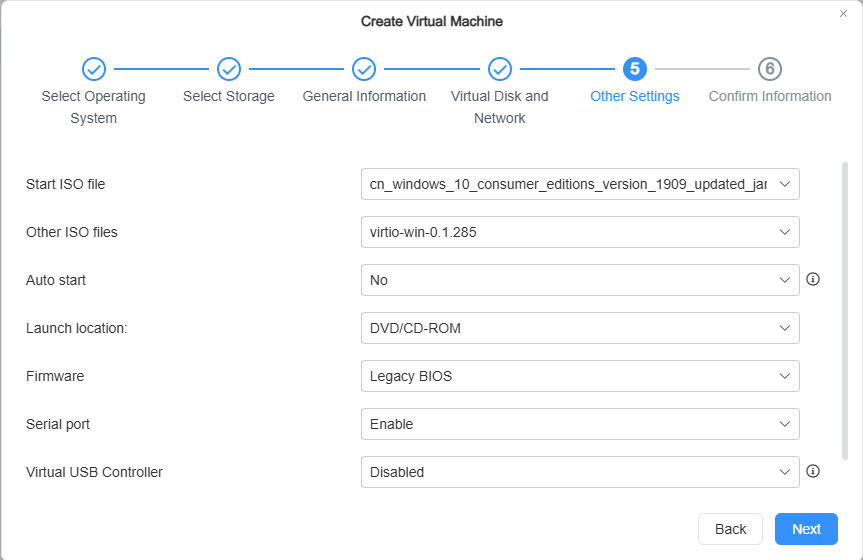
- Configure the image and parameters.
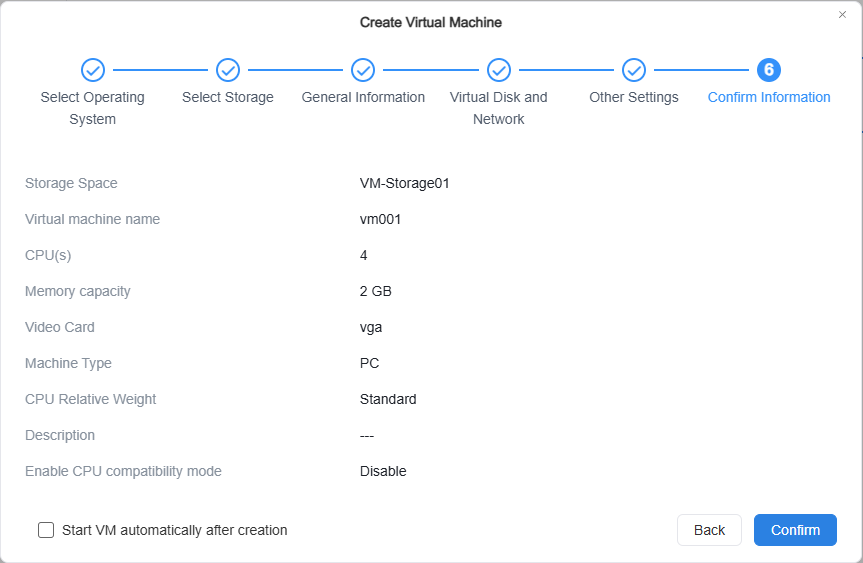
 7. Confirm information. After clicking Confirm, the virtual machine creation is completed. Use the "Connect" button in the virtual machine details for VNC connection access.
Note
• If the network card type is selected as VirtIO, drivers need to be installed following the subsequent process;
• Virtual networks can be added, removed, or adjusted later;
• Mac addresses should be avoided being duplicated as much as possible.
Operating System Installation Process
Windows 10
- Confirm that the driver ISO file is mounted on the virtual machine. In the Windows installation interface, at the step "Where do you want to install Windows?", click "Load driver." The driver ISO file can be removed after the driver installation.
- Click "Confirm" to load all drivers.
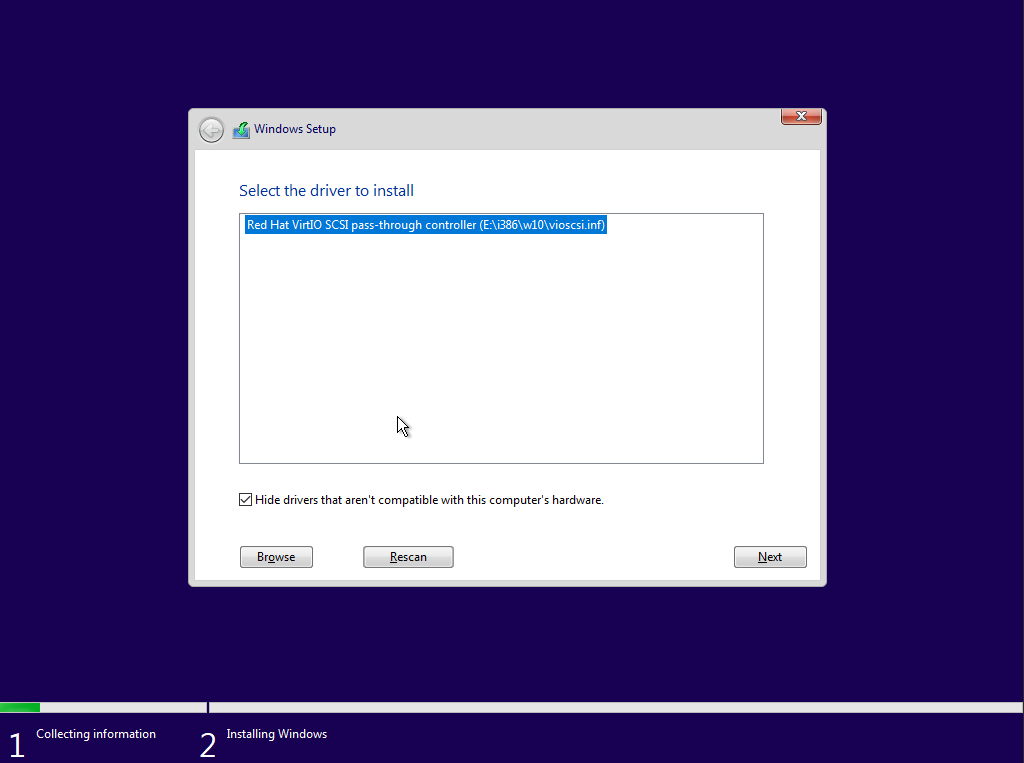
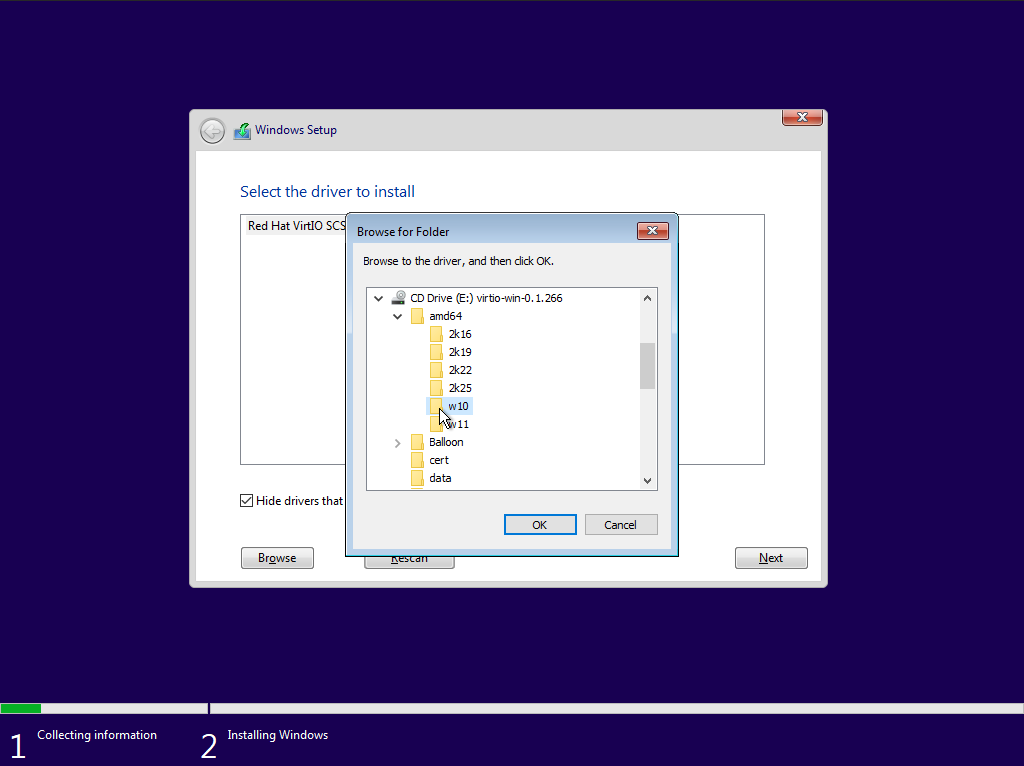
- After the driver search is complete, click to select the w10 version of "Red Hat VirtIO SCSI pass-through controller," then click Next to install.
- After the driver installation is complete, the virtual disk will be recognized, and you can continue following the instructions to complete the installation process.
Installing virtio guest tool
Installing virtio guest tool can enhance the host machine's control over the virtual machine, including monitoring internal memory usage data of the virtual machine.
Windows 11 / Windows 10
- Please first confirm that the driver ISO file is mounted on the virtual machine. The driver ISO file can be removed after the driver installation is complete. Open My Computer, and click to open the CD drive.
- Find and open the virtio-win-gt-x64.msi file (for 32-bit operating systems, choose virtio-win-gt-x86.msi), and follow the instructions to complete the driver installation.
Windows 7
- Please first confirm that the driver ISO file is mounted on the virtual machine. The driver ISO file can be removed after the driver installation is complete. In Windows, search for "Control Panel" and open it, then click "Hardware and Sound" and then "Device Manager".
- In Device Manager, find the devices without drivers under "Other devices," right-click, and select "Update Driver Software".
- Select "Browse my computer for driver software".
- Click "Browse," select the mounted CD drive, confirm the selection, and click "OK".
- Wait for the system to automatically search for the driver, then click Install. Wait for the driver installation to complete.