TerraSync
With the TerraSync application, you can turn your TNAS into a private cloud storage server. TerraSync is the leading application running on TNAS, and with the TerraSync Client, TNAS PC for Windows, TNAS PC for Mac, and TNAS PC for Linux, it enables file synchronization between multiple devices across different platforms.
Application Components
- TerraSync: A server-side application running on TNAS, essential for file synchronization between TNAS and client devices.
- TerraSync Client: A client-side application on TNAS, enabling synchronization between different TNAS devices.
- TNAS PC for Windows: Client application for Windows computers, facilitating synchronization between TNAS and Windows PCs.
- TNAS PC for Mac: Client application for Mac computers, enabling synchronization between TNAS and Macs.
- TNAS PC for Linux: A client application running on Linux computers that enables file synchronization between TNAS and Linux computers.
Technical Specifications
| Device | Application | Operating System |
|---|---|---|
| TNAS | TerraSync | TOS5.0 and above (X86 architecture) |
| TNAS | TerraSync Client | TOS5.0 and above (X86 architecture) |
| Windows Computer | TNAS PC for Windows | Windows 10 2004 and above, Windows 11 |
| Mac Computer | TNAS PC for Mac | MacOS |
| Linux Computer | TNAS PC for Linux | Ubuntu 20.04 and above |
TerraSync
TerraSync application consists of TerraSync Team and TerraSync Console modules. TerraSync Team serves as the file management portal accessible via web, allowing users to manage and view files. TerraSync Console is a module specifically for administrator users, offering capabilities to manage connected client devices, add and enable team folders for synchronization with client devices, and access a global file version manager.
TerraSync Team
TerraSync Team is the web-based file management module of TerraSync. On the menu panel of TerraSync Team, you will find the following four categories, each clickable for detailed viewing:
Introduction to TerraSync Team
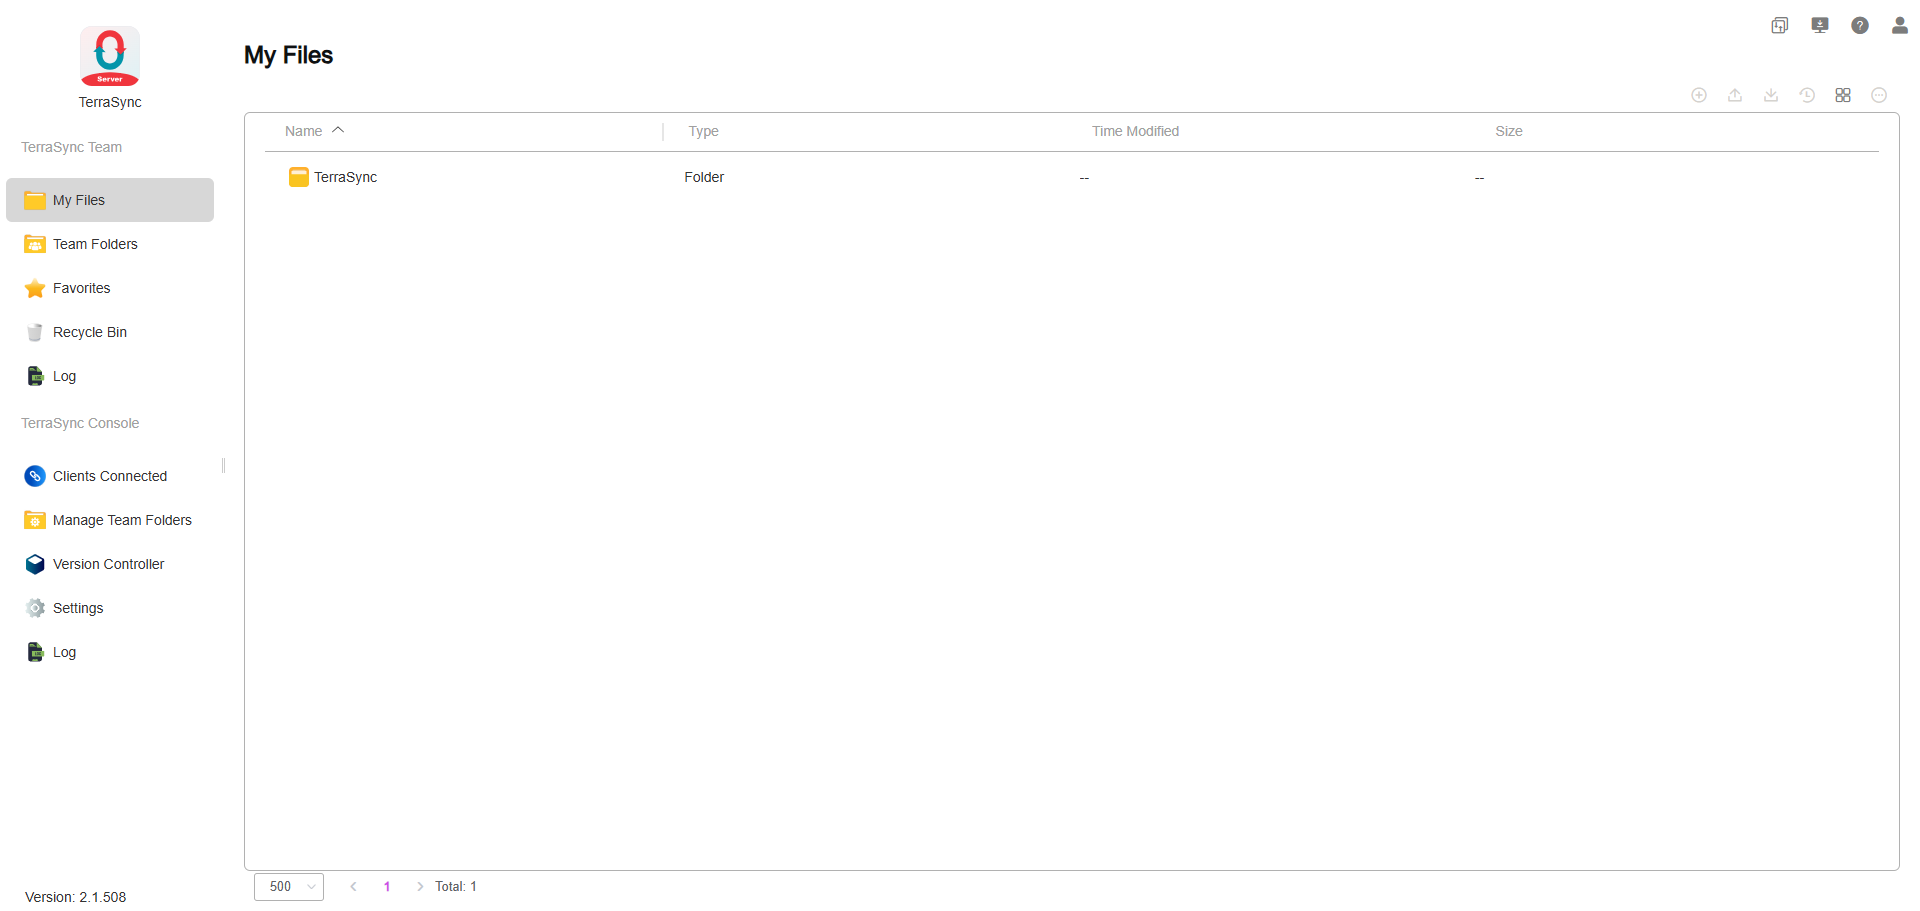
- My Files: View files and folders in your personal space, default directory: home/TerraSync.
- Team Folders: Access team folders where you have permission, used for synchronization tasks with client devices (requires administrator privileges). Once a shared folder on TNAS is added to Team Folders, file versioning is automatically enabled for potential file recovery in case of accidental deletion.
- Favorites: View files and folders you have marked as favorites.
- Recycle Bin: Access deleted files and folders.
- Log: View the current user's file operation records.
- To synchronize a shared folder on TNAS with a client device, add it to Team Folders, which requires administrator rights.
- Deleted files from Team Folders are moved to the recycle bin, accessible only by system administrators. To access the recycle bin of a Team Folder, navigate to Recycle Bin and switch to the corresponding Team Folder in the top-left corner.
Management Features
The main panel of TerraSync homepage displays files and folders. At the top of the main panel, you can view the path of the current location and click on it to navigate to specific levels.
Use the toolbar on the top right of TerraSync homepage to perform the following actions:
- New: Create a new file (.txt) or folder.
- Upload: Upload files from your computer to TNAS.
- Download: Download selected items.
- Version History: View version history of files. Choose a version to download or restore.
• Download: Download the current version of the file.
• Restore: Restore the file to the selected version. - Switch List View:
• Thumbnail: Display large thumbnails with file/folder titles.
• List: Display small file type icons, along with file/folder titles, type, modification time, size, with appropriate spacing.
• Column View: The column view mode divides the file view into multiple columns, allowing users to browse files and folders from different locations simultaneously, improving file operation efficiency. - More: Select items and click this icon for additional operations.
• Delete: Delete the selected item and move it to the owner's recycle bin.
• Rename: Rename the item.
• Add to Favorites: Add the selected item to favorites.
• Remove from Favorites: Remove selected items from favorites.
• Move to: Move items within TerraSync to other locations.
• Copy to: Copy items within TerraSync to other locations.
• Properties: View detailed information about the item.
File versioning is based on the file path. Changing the file name will result in previous versions no longer being visible. To find versions before a name change, revert the file name to its previous state.
TerraSync Console
TerraSync Console is a module accessible exclusively to administrator users. Administrators can use this module to view and manage connected client devices, add and enable team folders on TNAS for syncing with client devices, and have access to a global file version manager.
Introduction to TerraSync Console
- Connected Clients: View and manage a list of all client devices that have connected to the current TerraSync server. You can see details such as client name, operating system, application version, IP address, username, and current connection status.
• Disconnect: Select an item and click this option to terminate the client connection.
• Refresh: Click to update the list.
- After disconnecting, client devices will need to re-enter their password for reconnection. Administrators can modify usernames' passwords in TOS or delete users to prevent them from continuing to connect to the TerraSync server, ensuring data security.
- Manage Team Folders: Add shared folders on TNAS as team folders for TerraSync, which can be used as sync folders for client devices. The system automatically enables file version management for team folders, allowing file restoration in case of accidental changes. Here, you can enable or disable sync functionality for team folders. Once enabled, team folders allow users with read/write permissions to sync them.
• Add: Add a shared folder on TNAS as a TerraSync team folder and set version retention policies: version limit and retention period.
• Edit: Edit the version retention policy of a team folder: version limit and retention period.
• Version Retention Policy: Limit on the number of versions and version retention period. Supports limiting the number of versions or disabling version control to save storage space.
• Disable/Enable: Disable or enable a team folder. Team folders must be enabled for users with read/write permissions to sync them.
• Delete: Remove selected items.
- To set TNAS shared folders as sync directories for clients, add these folders as TerraSync team folders.
- It takes some time to generate file versions when adding TNAS shared folders to TerraSync team folders. The time required depends on the size and quantity of files in the folder.
- Deleting a team folder will also delete all file version data within that folder. Proceed with caution.
- Encrypted shared folders can be added and used as team folders. When the encrypted folder is unmounted, its status becomes unavailable, and all tasks related to this encrypted shared folder will fail. Normal operation can resume after remounting.
- Volumes with the HyperLock-WORM file system attribute do not support using their subordinate shared folders as team shared folders.
- Switching version control on/off will cause the synchronization and backup tasks under that team folder to become invalid. You need to delete the original synchronization or backup tasks and recreate them. Moreover, when the team folder switches from version control enabled to disabled, all previously created versions will be deleted. Please switch with caution.
- Version Controller: When files are added to the TerraSync server, initial file versions are automatically generated with their creation time as the entry time. When files added to the TerraSync server are modified, new versions are created. In the Version Controller, you can search for any past time point as needed. Selecting a file and clicking "Restore" will revert the file to the version from the selected time point. Similarly, clicking "Download" will download the file version from that time point.
• Time Search: Select a time and search to display the status of files in the directory at that time.
• Restore: Restore the current file to the version at the time point you selected. Supports selecting multiple files/folders for restoration.
• Download: Download the version at the time point you selected.
• History Versions: View all version history records for the selected item. Choose a version to download or view. - Settings: View the default port for the TerraSync server: 8023.
- Log: View the file operation records of all users.
TerraSync Client
TerraSync Client is an application for syncing data between TNAS devices. Before using it, ensure that the TerraSync server application is installed and enabled on the TNAS device you wish to connect to.

Management
- Connections: Manage and view all connections established by the current TerraSync Client application with remote TerraSync servers. You can view the IP address, port, number of tasks, and connection status between the local TNAS and the remote TerraSync server.
• Create: Connect to a remote TerraSync server.
• Edit: Modify the IP address, port, and password of a remote TerraSync server.
• Delete: Disconnect from a remote TerraSync server.
- If connecting via WAN IP or DDNS to a remote TerraSync server, configure port forwarding for port 8023 on your router and enter the mapped port number here.
- When the IP address, port, or user password of a remote TNAS TerraSync server changes, edit the settings here to reconnect and continue syncing. Existing sync tasks and connection settings do not need to be deleted; just adjust the configuration.
- Before deleting the connection to a remote TNAS TerraSync server, ensure all sync tasks on that server are deleted.
- Tasks: In this category, manage and view all sync tasks created by the current TerraSync Client application. You can view sync task lists under each TerraSync server, including task name, sync direction, local sync directory, remote sync directory, and sync task status.
• Create: Create a sync task.
• Edit: Modify sync direction and filtering rules.
• Pause/Resume: Pause or resume selected sync tasks.
• Delete: Delete selected sync tasks. - Settings: Manage "Reconnect Policy" and "File Conflict Policy".
Reconnection Strategy: The reconnection strategy refers to the rules triggered when file data being operated on is interrupted due to client exit or network disruption upon the next client application launch.
- Deleted local files will be redownloaded from the TerraSync server: Files deleted locally will be redownloaded from the remote TNAS.
- Deleted local files will be synchronized for deletion from the TerraSync server: Files deleted locally will be synchronized for deletion from the remote TNAS.
File Conflict Strategy:
- Retain the latest modified version: In case of file conflicts between the server and client applications, the newest file (latest modification timestamp) will be retained. If the local file in the client application is the newest, then the server's file becomes a historical version. Conversely, if the server's file is the latest, the local file will be discarded, but you can choose the option to rename to retain the discarded version.
- Retain the version on the server: In the event of file conflicts between the server and client applications, the file on the server will always be retained, and the local version will be discarded. You can choose the option to rename to retain the discarded version.
How to Create a Sync Task in TerraSync Client?
Method One: Under the "Tasks" category, click "Create", select "New Server" to connect to the TerraSync server. Click "Next" and follow the on-screen instructions to create a sync task.
Method Two: Under the "Connections" category, click "Create" to connect to the TerraSync server. Then, under the "Tasks" category, click "Create" and choose "Connected Server" to create a sync task.
- Connect to Remote TerraSync Server: Use the "Create TerraSync Server" function to enter the IP address, port, username, and password of the remote TerraSync server to establish a connection.
- Create Sync Task: Navigate to the "Tasks" page, click "Create", and select the TerraSync server you have connected to under the "Connected Server" option.
- Choose Sync Mode
- Task Settings: Enter the task name, local TNAS shared folder, and remote TNAS shared folder.
- Enter Filter Settings: Specify file sync size limits and exclude files or file extensions that should not be synchronized.
• Maximum File Size (MB): Files larger than the specified size will not be synchronized.
• File Name: Files containing specified file names will not be synchronized.
• File Extension: Files with specified file extensions will not be synchronized. Add ".extension" to the table, for example ".pdf". - Confirm Settings: Upon reaching the "Confirm Settings" page, you can review the parameters of the current sync task. If modifications are needed, click "Previous" to return to previous pages for adjustments. If everything is correct, click "Confirm" to complete the sync task creation.
TerraSync offers 3 synchronization modes for users:
-
Two-Way Sync: Two-Way Sync ensures bidirectional data synchronization between two sync directories. Any changes in either the local or remote directory are instantly mirrored to the other, maintaining consistent data on both sides. This mode is ideal for keeping data synchronized across multiple devices, such as syncing files between different computers or TNAS units.
-
One-Way Download: One-Way Download synchronizes data from the remote directory to the local directory. Updates made in the remote directory automatically download to the local directory, but changes in the local directory are not uploaded. This mode is commonly used to fetch the latest files or data from a remote server.
-
One-Way Upload: One-Way Upload synchronizes data from the local sync directory to the remote sync directory. Any changes made in the local directory are uploaded to the remote directory, but changes in the remote directory are not downloaded locally. Additionally, an option is provided to "Keep locally deleted files on the server" to recover accidentally deleted files from the remote directory. This mode is well-suited for data backup or sharing files for others to access.
Unable to Connect to Remote TerraSync Server?
Follow these steps to troubleshoot:
- Ensure the remote TNAS device is powered on and accessible through the TOS system.
- Check the network connection between your local TNAS device and the remote TNAS device.
- Verify that the TerraSync application on the remote TNAS device is installed and enabled.
- Confirm the IP address/domain name of the TerraSync server on the remote TNAS device is accurate.
- If using WAN IP or DDNS, ensure port forwarding (port 8023) is configured on your router for the remote TNAS device.
- Verify the username and password are correct.
- Ensure both server and client are updated to the latest versions.
- If your device connects through a proxy, disable the proxy and try connecting to the TerraSync server again.
TNAS PC (Windows /Mac /Linux)
TNAS PC is a versatile desktop application developed by TerraMaster, designed to simplify and enhance the user experience with TNAS. The TerraSync Windows/Mac client is integrated within TNAS PC, facilitating data synchronization between Windows/Mac computers and TNAS. Before using this application, ensure that the TNAS device you wish to connect to has installed and activated the TerraSync server application.

TerraSync Server
Manage and view all connected remote TerraSync servers linked with the current TNAS PC client application. You can view the IP address, number of tasks, and connection status of each remote TerraSync server.
To achieve stable communication between the TNAS PC client and the remote TerraSync server under different network environments and resolve cross-network connection issues, when your device meets the following conditions: TerraSync server version is not lower than 2.1.515, TNAS PC client version is not lower than 5.2.510, and the TNAS runs the TOS7 system. Simply go to Control Panel - Network Services - Remote Access, enable the TNAS.online Remote Access function, and you can then establish a remote connection with the TerraSync server via TNASID in the TNAS PC client.
- View Online: Select an item and click this option to directly access the TerraSync web interface, allowing easy viewing and editing of files and folders on the remote TerraSync server.
- Create: Click this option, enter the IP address, port, username, and password of the remote TerraSync server to establish a connection.
- Edit: Select an item and click this option to edit the IP address, port, or password of a remote TerraSync server.
- Delete: Select an item and click this option to delete the connection with the remote TerraSync server.
TerraSync Synchronization Tasks
Manage and view all synchronization tasks created by the current TNAS PC client application. You can view the list of tasks under each TerraSync server, including task name, synchronization direction, on-demand sync enablement, local sync directory, remote sync directory, and synchronization status of each task.
- Create: Click this option to create a new synchronization task.
- Edit: Select an item and click this option to edit synchronization direction, on-demand sync, and filtering rules.
- Pause/Resume: Select an item and click this option to pause/resume the selected synchronization task.
- Retry: Allows retrying failed synchronization tasks.
- Delete: Select an item and click this option to delete the selected synchronization task.
- Settings: Under this category, manage and view "Reconnection Strategy" and "File Conflict Strategy".
What is On-Demand Sync?
On-Demand Sync is an option for configuring TerraSync synchronization tasks between computers and TNAS. When this option is enabled, files are downloaded to the local computer only when you open, modify a local copy, or pin it to the computer. On-Demand Sync helps reduce computer storage usage, thereby enhancing storage efficiency.
| Icon | Description |
|---|---|
 | Your file or folder is available online but does not occupy storage space on your computer. You can open the local copy and download it to the computer. You can also right-click the file and choose Always keep on this device to permanently retain the local copy. |
 | Your file or folder has been downloaded to the local computer and temporarily occupies storage space. When you enable Windows Storage Sense, such files will transition to being available online. You can right-click and choose Always keep on this device to permanently retain the local copy, or select Free up space to save storage. |
 | The file has been permanently pinned to the local computer and permanently occupies storage space, allowing offline access. You can right-click the file and choose Always keep on this device to unpin it and convert it to a locally temporary available file. Alternatively, choose Free up space to save storage. |
How to Use On-Demand Sync to Synchronize Files?
On-Demand Sync is enabled by default when creating synchronization tasks. You can also enable this option by following these steps:
- Select the TerraSync synchronization task, click Edit > Sync Mode, and check the Enable On-Demand Sync checkbox.

- Clicking on the local folder path in the synchronization task opens the local sync folder in Windows File Explorer. You can also click on the task name in the left pane of Windows File Explorer to quickly open the local sync folder.

- Right-click any file and choose Always keep on this device / Free up space to pin the file to the local device or release storage space.

- Choosing Always keep on this device changes the file's status, allowing it to remain accessible on the computer when offline.
How to Create Synchronization Tasks via TNAS PC Application?
Method One: Under the "Tasks" category, click "Create", select "New Server" to connect to the TerraSync server. Click "Next" and follow the on-screen instructions to create a sync task.
Method Two: Under the "Connections" category, click "Create" to connect to the TerraSync server. Then, under the "Tasks" category, click "Create" and choose "Connected Server" to create a sync task.
- Connect to Remote TerraSync Server: Use the "Create TerraSync Server" function to enter the IP address, port, username, and password of the remote TerraSync server to establish a connection.
- Create Sync Task: Navigate to the "Tasks" page, click "Create", and select the TerraSync server you have connected to under the "Connected Server" option.
- Choose Sync Mode
- Task Settings: Enter the task name, local TNAS shared folder, and remote TNAS shared folder.
- Enter Filter Settings: Specify file sync size limits and exclude files or file extensions that should not be synchronized.
• Maximum File Size (MB): Files larger than the specified size will not be synchronized.
• File Name: Files containing specified file names will not be synchronized.
• File Extension: Files with specified file extensions will not be synchronized. Add ".extension" to the table, for example ".pdf". - Confirm Settings: Upon reaching the "Confirm Settings" page, you can review the parameters of the current sync task. If modifications are needed, click "Previous" to return to previous pages for adjustments. If everything is correct, click "Confirm" to complete the sync task creation.
Local Directory Requirements on Windows Computers:
- Must be a folder on an NTFS hard drive.
- Not the root directory of a hard drive (e.g., C:\ or D:) or a primary directory (e.g., C:\Users).
- Not a folder that is a parent or child folder of TerraSync On-demand Sync, OneDrive File On-demand, or iCloud Drive tasks.
- Not a folder within a network drive, cloud drive, or USB drive.
TerraSync Backup Tasks
Creating a backup task allows you to back up files from multiple client computers to the NAS, protecting computer data.
- Create: Click this option to create a backup task.
- Edit: Select an item and click this option to edit the backup source, backup mode, and filter rules.
- Pause/Resume: Select an item and click this option to pause/resume the selected backup task.
- Backup Now: When the backup mode is "Manual Backup" or "Scheduled Backup", click this option for an immediate backup.
- Retry: Allows retrying failed backup tasks.
- Delete: Select an item and click this option to delete the selected backup task.
- Only one backup task can be created for each client.
- Only allowing one backup task prevents conflicts between multiple tasks, especially when different tasks may include the same backup source. File version management is enabled by default on the NAS to ensure stability and reliability during the backup process.
- Only allowing one backup task means there will only be one backup destination folder on the NAS (named after your computer). This makes managing backups for multiple computers clearer and more efficient, allowing users to quickly find the desired backup without searching through multiple NAS folders.
How to Create a Backup Task via TNAS PC?
Method 1: Under the "Backup Tasks" category, click "Create" and select "New Server" to connect to the TerraSync server. Click "Next" and follow the on-screen instructions to create a sync task.
Method 2: Under the "TerraSync Server" category, click "Create" to connect to the TerraSync server. Then, under the "Backup Tasks" category, click "Create" and select "Connected Server" to create a sync task.
- Connect to the TerraSync Server: Use the "TerraSync Server" creation function to input the IP address, port, username, and password of the remote TerraSync server to connect to it;
- Create a Backup Task: On the "Backup Tasks" page, click "Create", select the TerraSync server you wish to back up to under the "Connected Servers" option;
- Choose the backup source;
- Choose the backup destination;
- Choose the backup mode;
- On the "Filter Settings" page, you can set a file size limit for the backup and exclude files by file name or file extension;
In Filter Settings, specify folders and files you do not want to back up:
• File size limit (max): If a file exceeds the specified size, it will not be backed up.
• File name: Any file containing the specified file name will not be backed up.
• File extension: Any specified file extension will not be backed up. Add *.extension in the table, for example, *.pdf. - On the "Confirm Settings" page, you can check whether the parameters for the current backup task are correct. If modifications are needed, click "Previous" to return to the previous page and make adjustments. If everything is correct, click "Confirm" to complete the creation of the backup task.
TerraSync provides three sync modes for users: Instant Backup, Manual Backup, and Scheduled Backup
- Instant Backup: This mode monitors file changes in real time and automatically backs up the latest files to the specified location. This ensures that all important data is protected in case of unexpected events, making it ideal for businesses or individual users who need continuous data security.
- Manual Backup: This mode gives users the flexibility to manually initiate backups whenever needed. It provides users who want full control over the backup process with autonomy, ensuring that important data is protected when required.
- Scheduled Backup: Users can set specific times and frequencies (e.g., daily, weekly, or monthly) to perform backups automatically. This mode greatly simplifies regular data protection, making
Tray
Right-click on the TNAS PC icon in the taskbar to quickly open the system tray menu. Here, you can easily pause or resume all sync tasks, view task statuses, and check sync history directly. Additionally, you can jump to the sync folders on your PC with one click and access TerraSync's web interface.

- Pause/Resume: Click the task status icon to pause/resume all tasks.
- Sync Folders: Click this icon to quickly access the sync folders on your PC.
- View Online: Click this icon to quickly access TerraSync's web interface.
- Settings: Click this icon to quickly open TerraSync's sync task interface.
- Exit: Click this icon to close the TNAS PC program.
Sync/Backup Task Rules
To enhance the user experience, TerraSync filters out files with the following extensions by default:
| Category | Specifics |
|---|---|
| The following files and drive types do not support synchronization or backup tasks: | · macOS aliases · Mounted drives (Windows/macOS) · Hidden files or folders · File types that are any of the following: tmp, temp, swp, lnk, !bw!, crdownload, ost, pst, part · File names starting with a tilde ‘ ~ ’, hash ‘ # ’, or period ‘ . ’ · File names that are or contain any of the following: _ter.tmp #recycle desktop.ini .DS_STORE Icon\r thumbs.db $Recycle.Bin System Volume Information Program Files Program Files (x86) @snapshot @tmp (backup tasks only) tmp (backup tasks only) temp (backup tasks only) |
| On Windows, synchronization or backup tasks do not support the following: | · Folder/file paths containing any of these characters: * : ? \ / " < > · Directory paths exceeding 247 characters · File paths exceeding 260 characters · File types that are shortcuts or symbolic links · Files or folders with the following attributes: OFFLINE SYSTEM TEMPORARY |
| On macOS, synchronization or backup tasks do not support: | · Folder/file paths containing any of these characters: \ / · Paths exceeding 1024 bytes · File names longer than 255 characters · File types that are any of the following: Icon/r Socket Device node FIFO .DS_STORE |
| On Linux, synchronization or backup tasks do not support: | · Folder/file paths containing any of these characters: \ / · Paths exceeding 4096 bytes · Names exceeding 255 bytes · File types that are any of the following: Socket Device node FIFO |
TerraSync Recommended Usage Guide
| Recommended NAS Models | Recommended Number of Users | Recommended RAM | Number of Files per Client That Can Be Synchronized |
|---|---|---|---|
| F2-425/F4-425/F2-424/F4-424/F6-424/F4 SSD /F8 SSD | 1-5 | 4GB | 100,000 |
| F4-424 Pro/F4-424 Max/F6-424 Max /F8 SSD Plus | 5-10 | 8GB | 500,000 |
| T9-423/T9-450/T9-500 Pro/T12-500 Pro/U4-500 | 11-20 | 16GB | 500,000 |
| U12-500 Plus/U8-500 Plus/U8-722/U16-722/U24-722 | 20-50 | 32GB | 500,000 |
- To support 50 or more users, it is recommended to configure at least 32GB of memory (if the original memory does not meet the recommended capacity, consider adding official TerraMaster memory) and enable SSD cache.
- The recommended maximum number of users is based on the following workload: 20% of users performing random file operations (upload, download, move, delete), and 80% of users remaining logged in but idle. Exceeding the recommended number of users may result in decreased application performance or unexpected errors.
- After enabling the team folder, the TerraSync server will begin file monitoring and version creation. The time required to create file versions will vary depending on the size of the team folder. During this period, CPU and memory usage of the NAS will be higher than usual, which is normal.
- System requirements: X86 architecture, TOS 5.1 or above.