Photos
Photos is an intelligent photo management application. With AI algorithms, Photos can recognize and categorize faces, pets, objects, and scenes in photos stored in designated directories. This allows you to sort, categorize, and share photos through a graphical interface, making it an ideal photo management tool for families and photography enthusiasts.
Getting Started
How to set up photo sources?
After installing Photos for the first time, you must go to TOS > Control Panel > Media Index, enable the media indexing feature, and add the folders where your photos or videos are stored to the index directory.
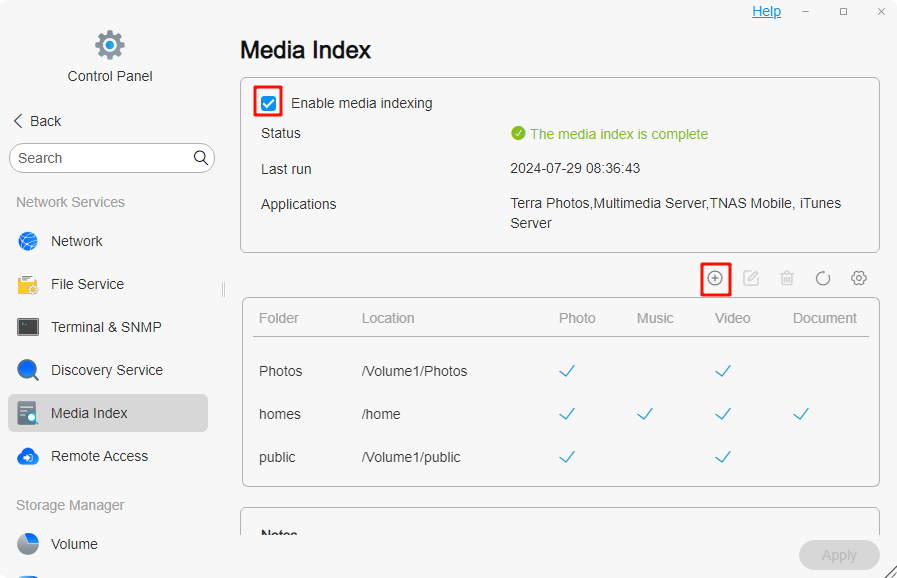
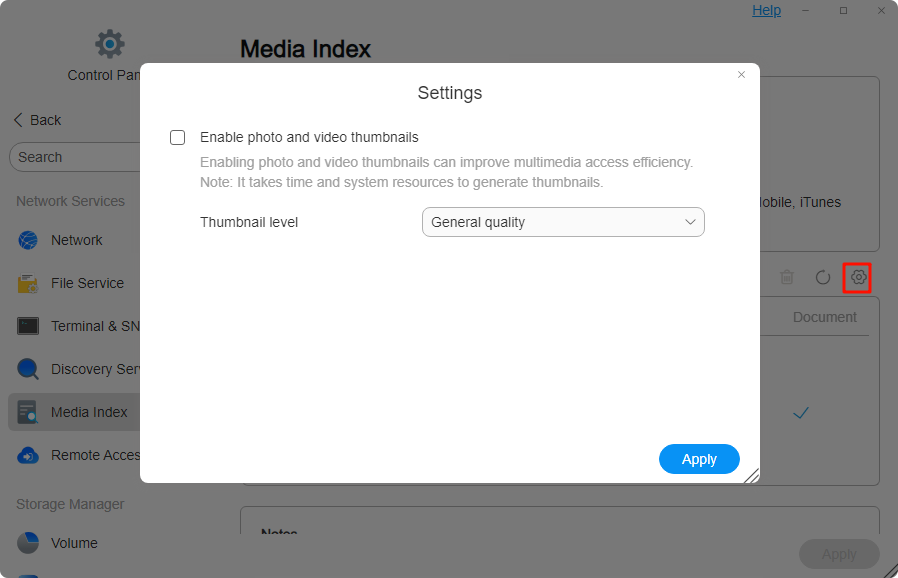
In the “Media Index” settings, you can adjust the quality of thumbnails: Standard Quality and High Quality.
Photos provides two options for different purposes: Personal Space and Public Space.
- Personal Space: Photos will create a “/home/Photos” folder under the home directory for each user authorized to use the application and automatically add this folder to the media index directory.
- Public Space: Photos will create a shared folder “/Volume1/Photos” to store Public Space files. Any user authorized to access this shared folder can view and manage media resources in Public Space.
- Folders in Photos follow the permission settings configured in File Manager within TOS.
- Enabling the media index and adding index directories requires administrator privileges.
How to upload photos to Photos?
- Click the Upload button to upload photos to Photos.
- If you already have photos stored in File Manager and want to manage them centrally in Photos, simply add that folder to the Media Index Directory.
- You can also use SMB or FTP to upload photos from your computer to folders that are included in the media index directory.
- You can also use TNAS Mobile to back up photos from your mobile phone to your personal “/home/Photos” folder.
How to access Photos?
- From TOS: Click Photos on the Desktop or in All Applications.
- Through an alias: To start Photos directly in a browser without logging in to TOS, go to App Center > Installed > Application Settings > Photos, configure the connection settings, and enable a custom alias. You can then access Photos directly at: `http://TNAS IP address/Photos
Features
Photos
You can view and manage all photos in Personal Space and Public Space. Photos provides comprehensive photo library management functions, allowing you to search, upload, download, delete, share, and favorite photos, as well as view photo properties and add photos to albums to meet diverse needs. The photo library is displayed by Timeline by default, helping you quickly locate photos based on time. In addition, for photography enthusiasts, a filter function is provided, enabling precise searches based on camera model, lens configuration, aperture, focal length, ISO, and exposure time.
- The Timeline browsing mode arranges photos in descending order of modification time.
- If you find that a photo’s time is incorrect in the Timeline, you can use the Edit Time function to correct it.
Videos
In this category, you can view and manage all videos in Personal Space and Public Space. You can search, download, delete, share, and favorite videos. By default, the video library is displayed by Timeline, helping you quickly locate videos based on time. Additionally, a filter function by video length is provided, allowing you to categorize content such as short videos, TV series, and movies.
- Due to browser limitations, some video formats are temporarily not supported for online playback. You may try another browser or map the video folder to your local computer via SMB for playback.
Albums
You can view and manage the albums you created. Photos provides four-grid photo covers, offering a richer presentation of your album contents. Albums are also displayed by Timeline, making it easy to locate photos based on time. In this interface, you can search, add, download, delete, share, and favorite photos, as well as remove unwanted photos. Moreover, you can customize the four-grid cover according to personal preference and album theme, creating a unique and aesthetically pleasing album cover.
Folders
You can view and manage all photos and videos in Personal Space and Public Space, while preserving the folder directory structure. If you have already organized folders by photo themes in TOS > File Manager, you can continue this efficient usage pattern here. This category also provides four-grid photo covers for a richer presentation of your album contents.
- In the Folders category, the storage path for uploaded photos is the currently open folder path.
- In the Photos category: In Personal Space, uploaded photos are stored at “/home/Photos/YYYYMMDD”; in Public Space, uploaded photos are stored at “/Photos/YYYYMMDD”.
People
AI People Recognition: Uses facial recognition technology to automatically detect and recognize each face in photos for automatic grouping.
Scenes
AI Scene Recognition: Uses image recognition technology to interpret the overall content, environment, and atmosphere of a photo, identifying objects, activities, and environment types. Supports 80+ scene categories such as dogs, cats, landscapes, documents, etc.
Places
Place Recognition: Infers locations based on GPS coordinates in the photo’s EXIF data and categorizes photos by place names.
Recently Added
View and manage photos or videos you recently uploaded to Photos.
Favorites
In this category, you can view and manage all photos and videos marked as favorites in Personal Space and Public Space.
Sharing
View and manage your shared albums. This category includes three modules: Shared with Me, Shared with Others (Internal), and Shared with Others (External).
- Shared with Me: Albums shared with you by other users on the same TNAS will appear here. You can co-manage these shared albums with other TNAS users.
- Shared with Others (Internal): Albums you share with other users/user groups on the same TNAS. You can assign management permissions (add, download, remove) to them to suit different needs.
- Shared with Others (External): Albums you share with external users. Only users with the link can access your shared albums. To ensure security, you can set permissions (add, download, remove), as well as a password and expiration date. (This feature requires enabling TNAS.online remote access.)
Settings
You can enable/disable AI Face Recognition, enable/disable AI Scene Recognition, clear people relationships, set storage locations, and more.
- Enabling AI Face Recognition is a global setting managed by the administrator.
- Setting media index directories also requires administrator privileges, and Photos inherits the user permissions from File Manager.
FAQ
How to merge people in bulk?
After AI face clustering, the same person may appear in multiple albums. To organize these photos more efficiently, follow these steps:
- Name a person album: First, assign a name to one of the person albums.
- Select the named album: Next, select the named album for that person in the interface.
- Select unnamed albums: Then, select the other unnamed albums of the same person.
- Click “Merge People”: Finally, click the “Merge People” icon in the top-right corner. The system will automatically merge all photos of that person into the initially named album.
What to do if a person album contains photos of the wrong person?
If a person album contains incorrectly recognized photos after AI clustering, select the incorrect photos, click “More” in the top-right corner, then click “Move.” You can remove the photos from the current person album or move them to the correct named album.
Why are there no classifications after enabling AI People/Scene/Place Recognition?
- Ensure other processes are complete: Confirm that media indexing and thumbnail generation tasks are finished.
- Try restarting AI recognition: You can try disabling and then re-enabling AI People/Scene Recognition. The system will restart the analysis.
Note: The five processes—media indexing, thumbnail generation, AI People Recognition, AI Scene Recognition, and Place Recognition—run in sequence. Classifications will only appear after the corresponding process has started.